Getting Started with thethings.iO
This guide will help you to start as quickly as possible with thethings.iO Platform. In 10 minutes, you'll be ready to build the next Big Thing connected to the Internet!
Introduction
theThings.iO is hardware agnostic. This means that we don't force you to use a specific hardware, provided that it is capable to use any of our supported protocols: HTTP, Websockets, MQTT.
theThings.iO platform provides a complete backend solution for IoT App Developers through an easy and flexible API. .
We will work with thethings.iO API REST, so you'll only need a system with curl installed to follow this overview.
Step 0 - Create your thethings.iO account
Fill in the form on the Sign Up Page. Once done, you'll be signed in to your panel automatically. There are a couple of restrictions:
- You need a valid e-mail.
- The password has to be at least 6 characters long.
Step 1 - Planning the Thing
Before typing any code, probably, you already have an idea and sketches of what do you want to connect to the Internet.
You will need to think about what data do you need to store, visualize and query. For example, if you are prototyping a thermostat, you can think about this data:
- Temperature
- Outdoor temperature
- Target temperature
- Humidity
- Outdoor humidity
- Status
Step 2 - Setup Your First Group of devices
To start connecting your hardware, first you need to set up your group of devices in the platform. A group of devices are those devices that are intended to have the same data input message structure and will share a decoder/parser, we will talk later about that.
- We will go to the device profiles list to create it.
- Click on 'Create New Profile'.
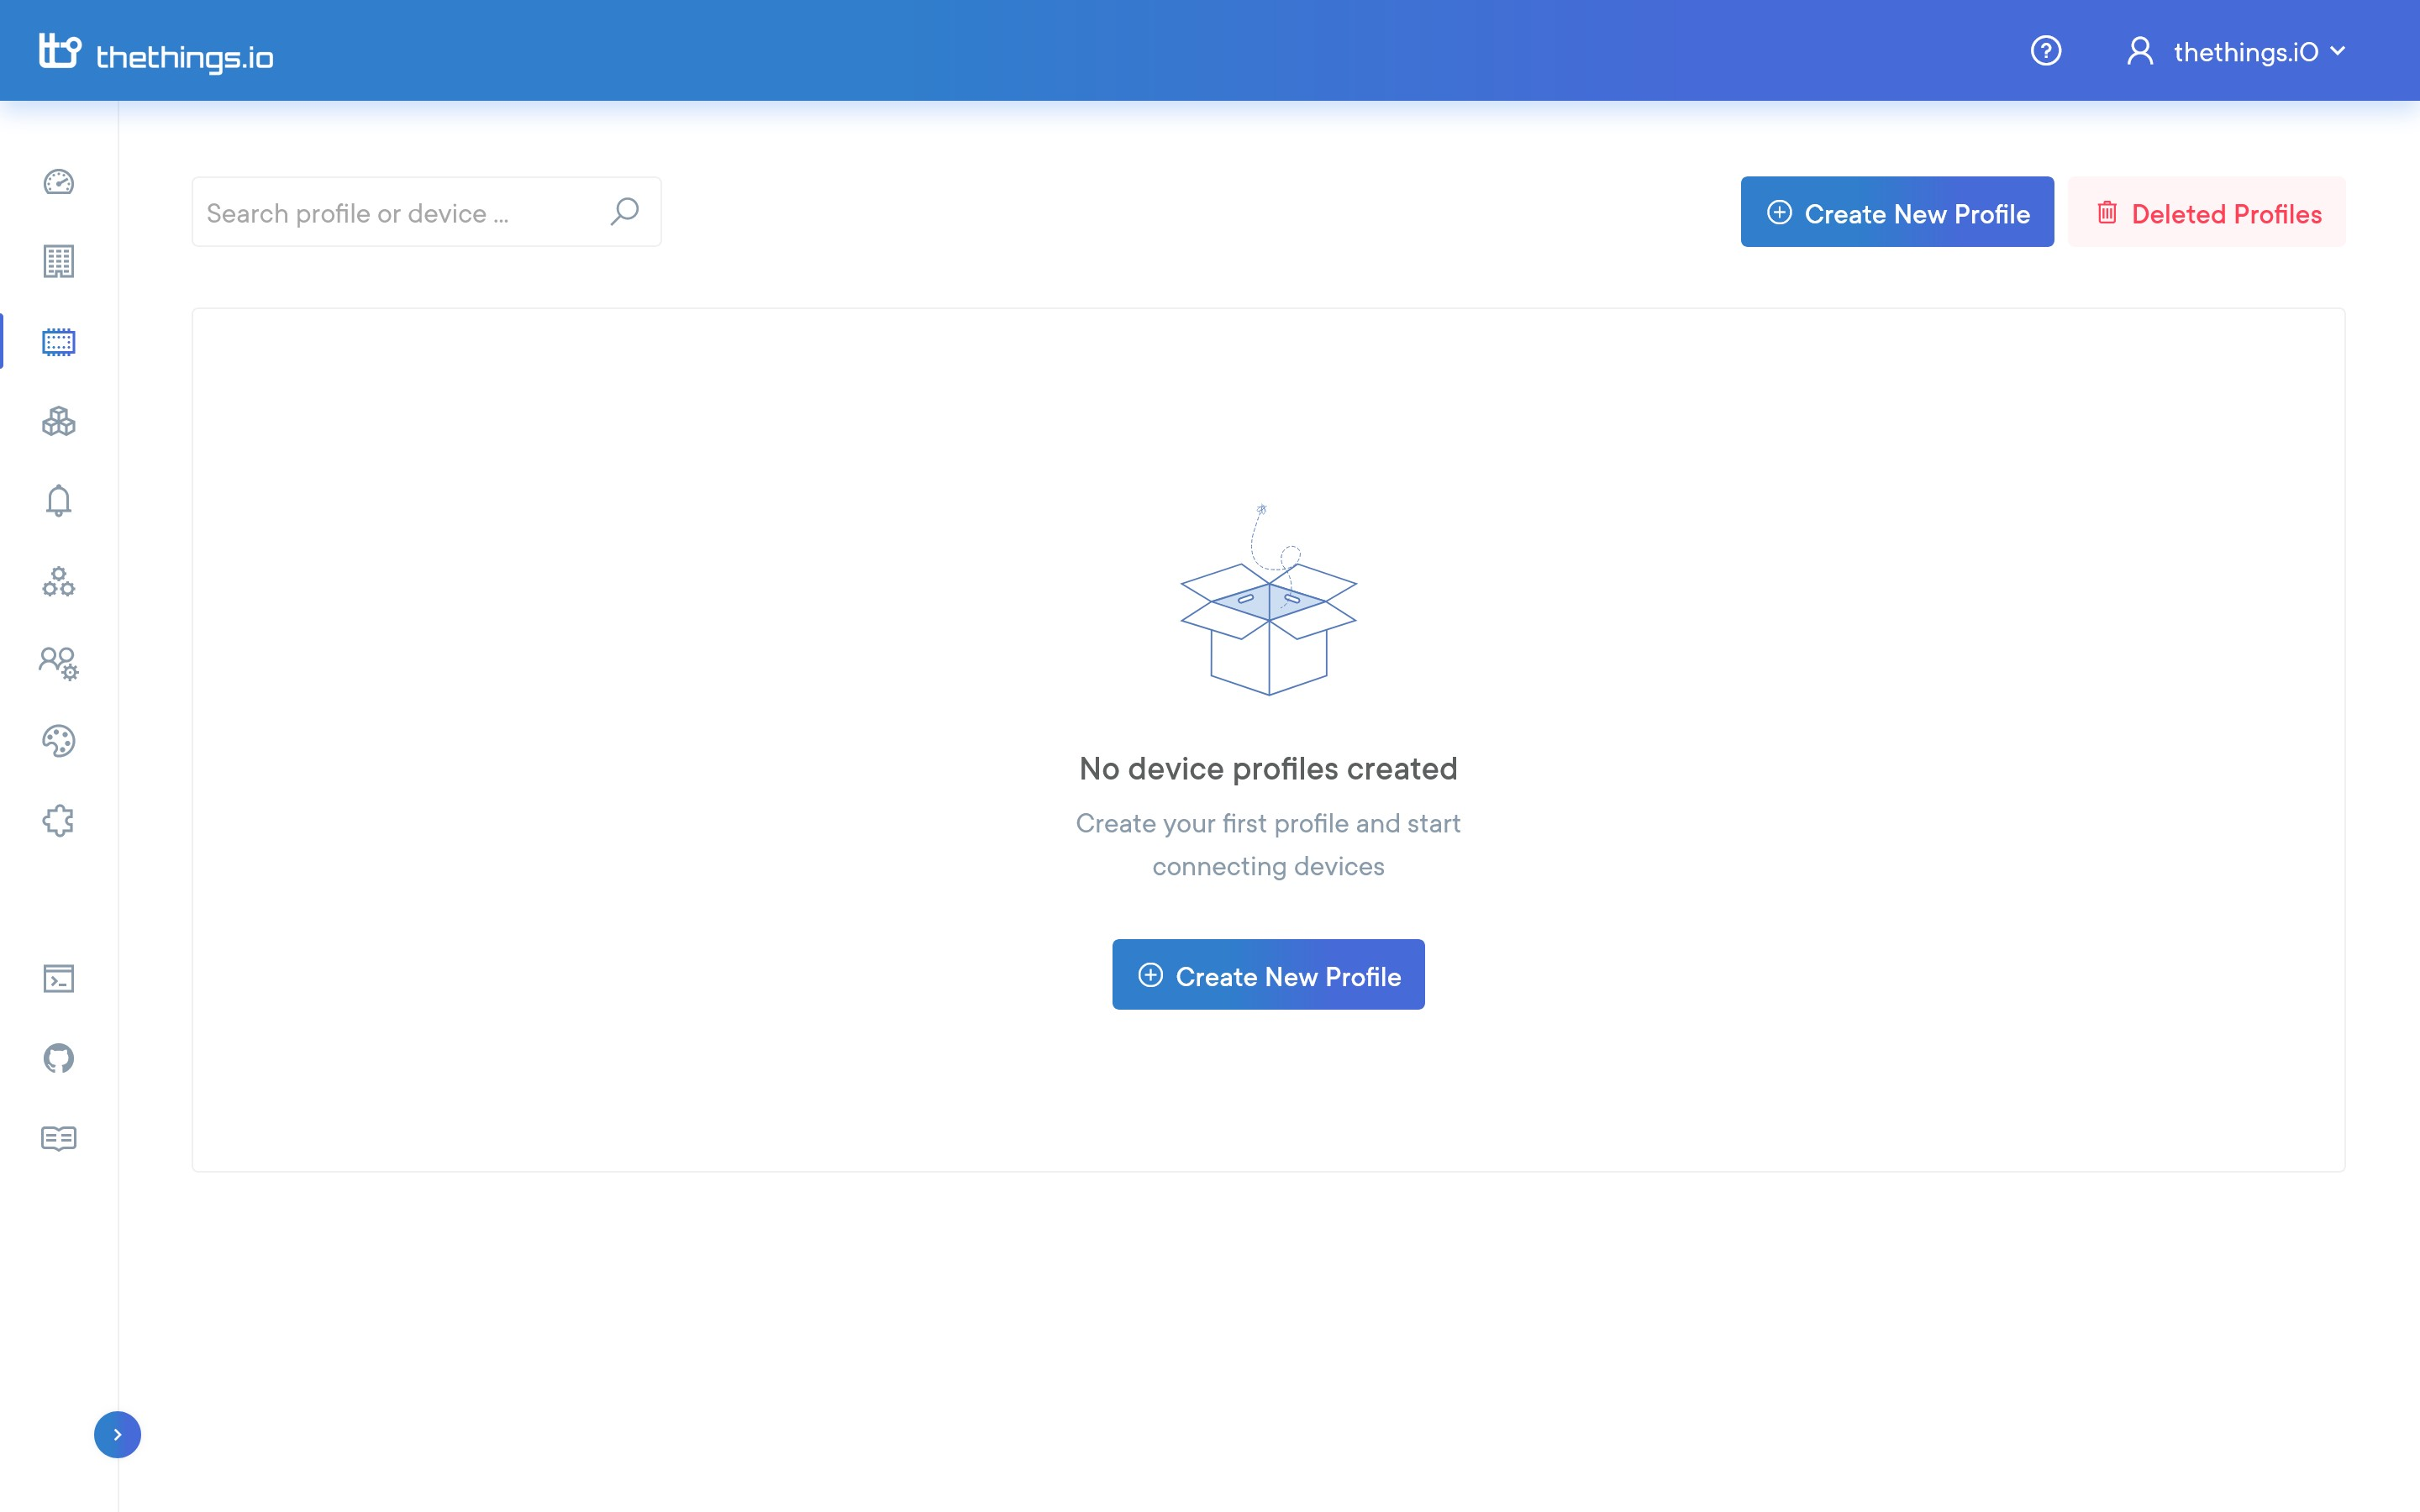
Fill out the following form. Put a name, a board and a description if you want. Leave the rest as it is.

Step 2 - Activate a thing inside the group of devices (only JSON group type)
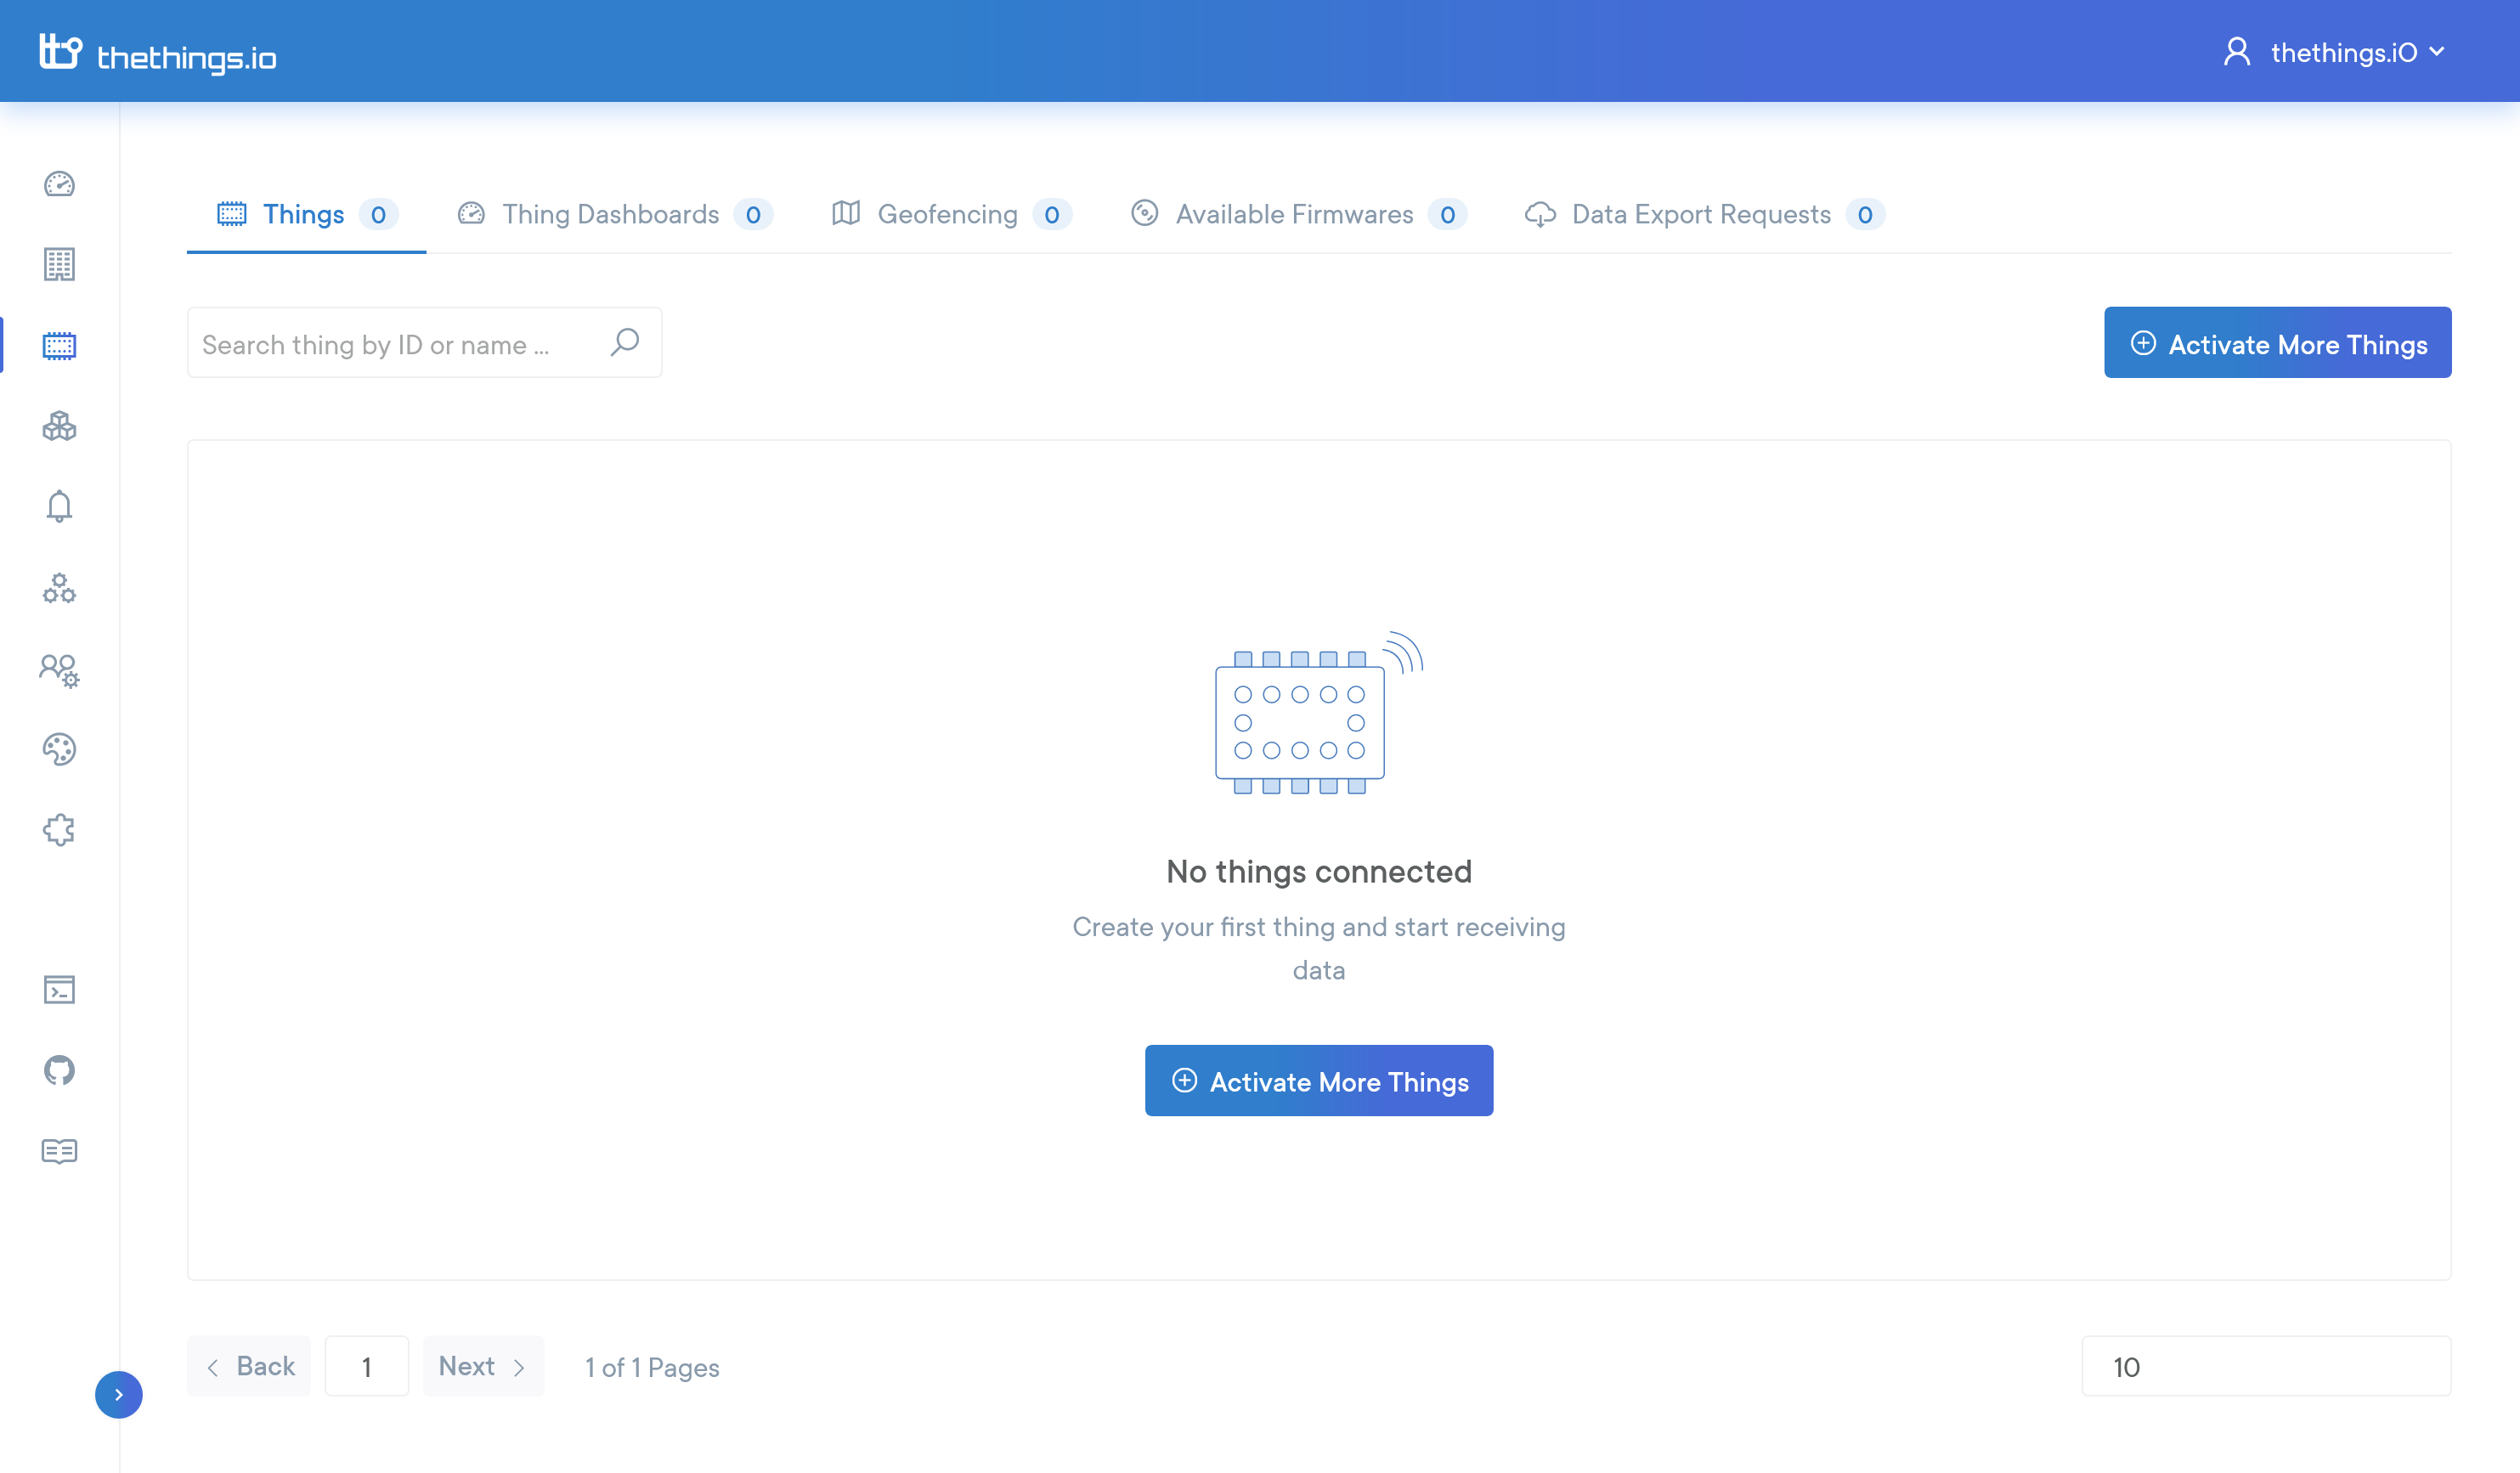
Once you have created your group of devices next step is to create things inside. Thing creation is made with activation codes. Once an activation code is used, a thing will be created. If your device type is Sigfox, LoRa, nb-IoT it will be created automatically once you send data.
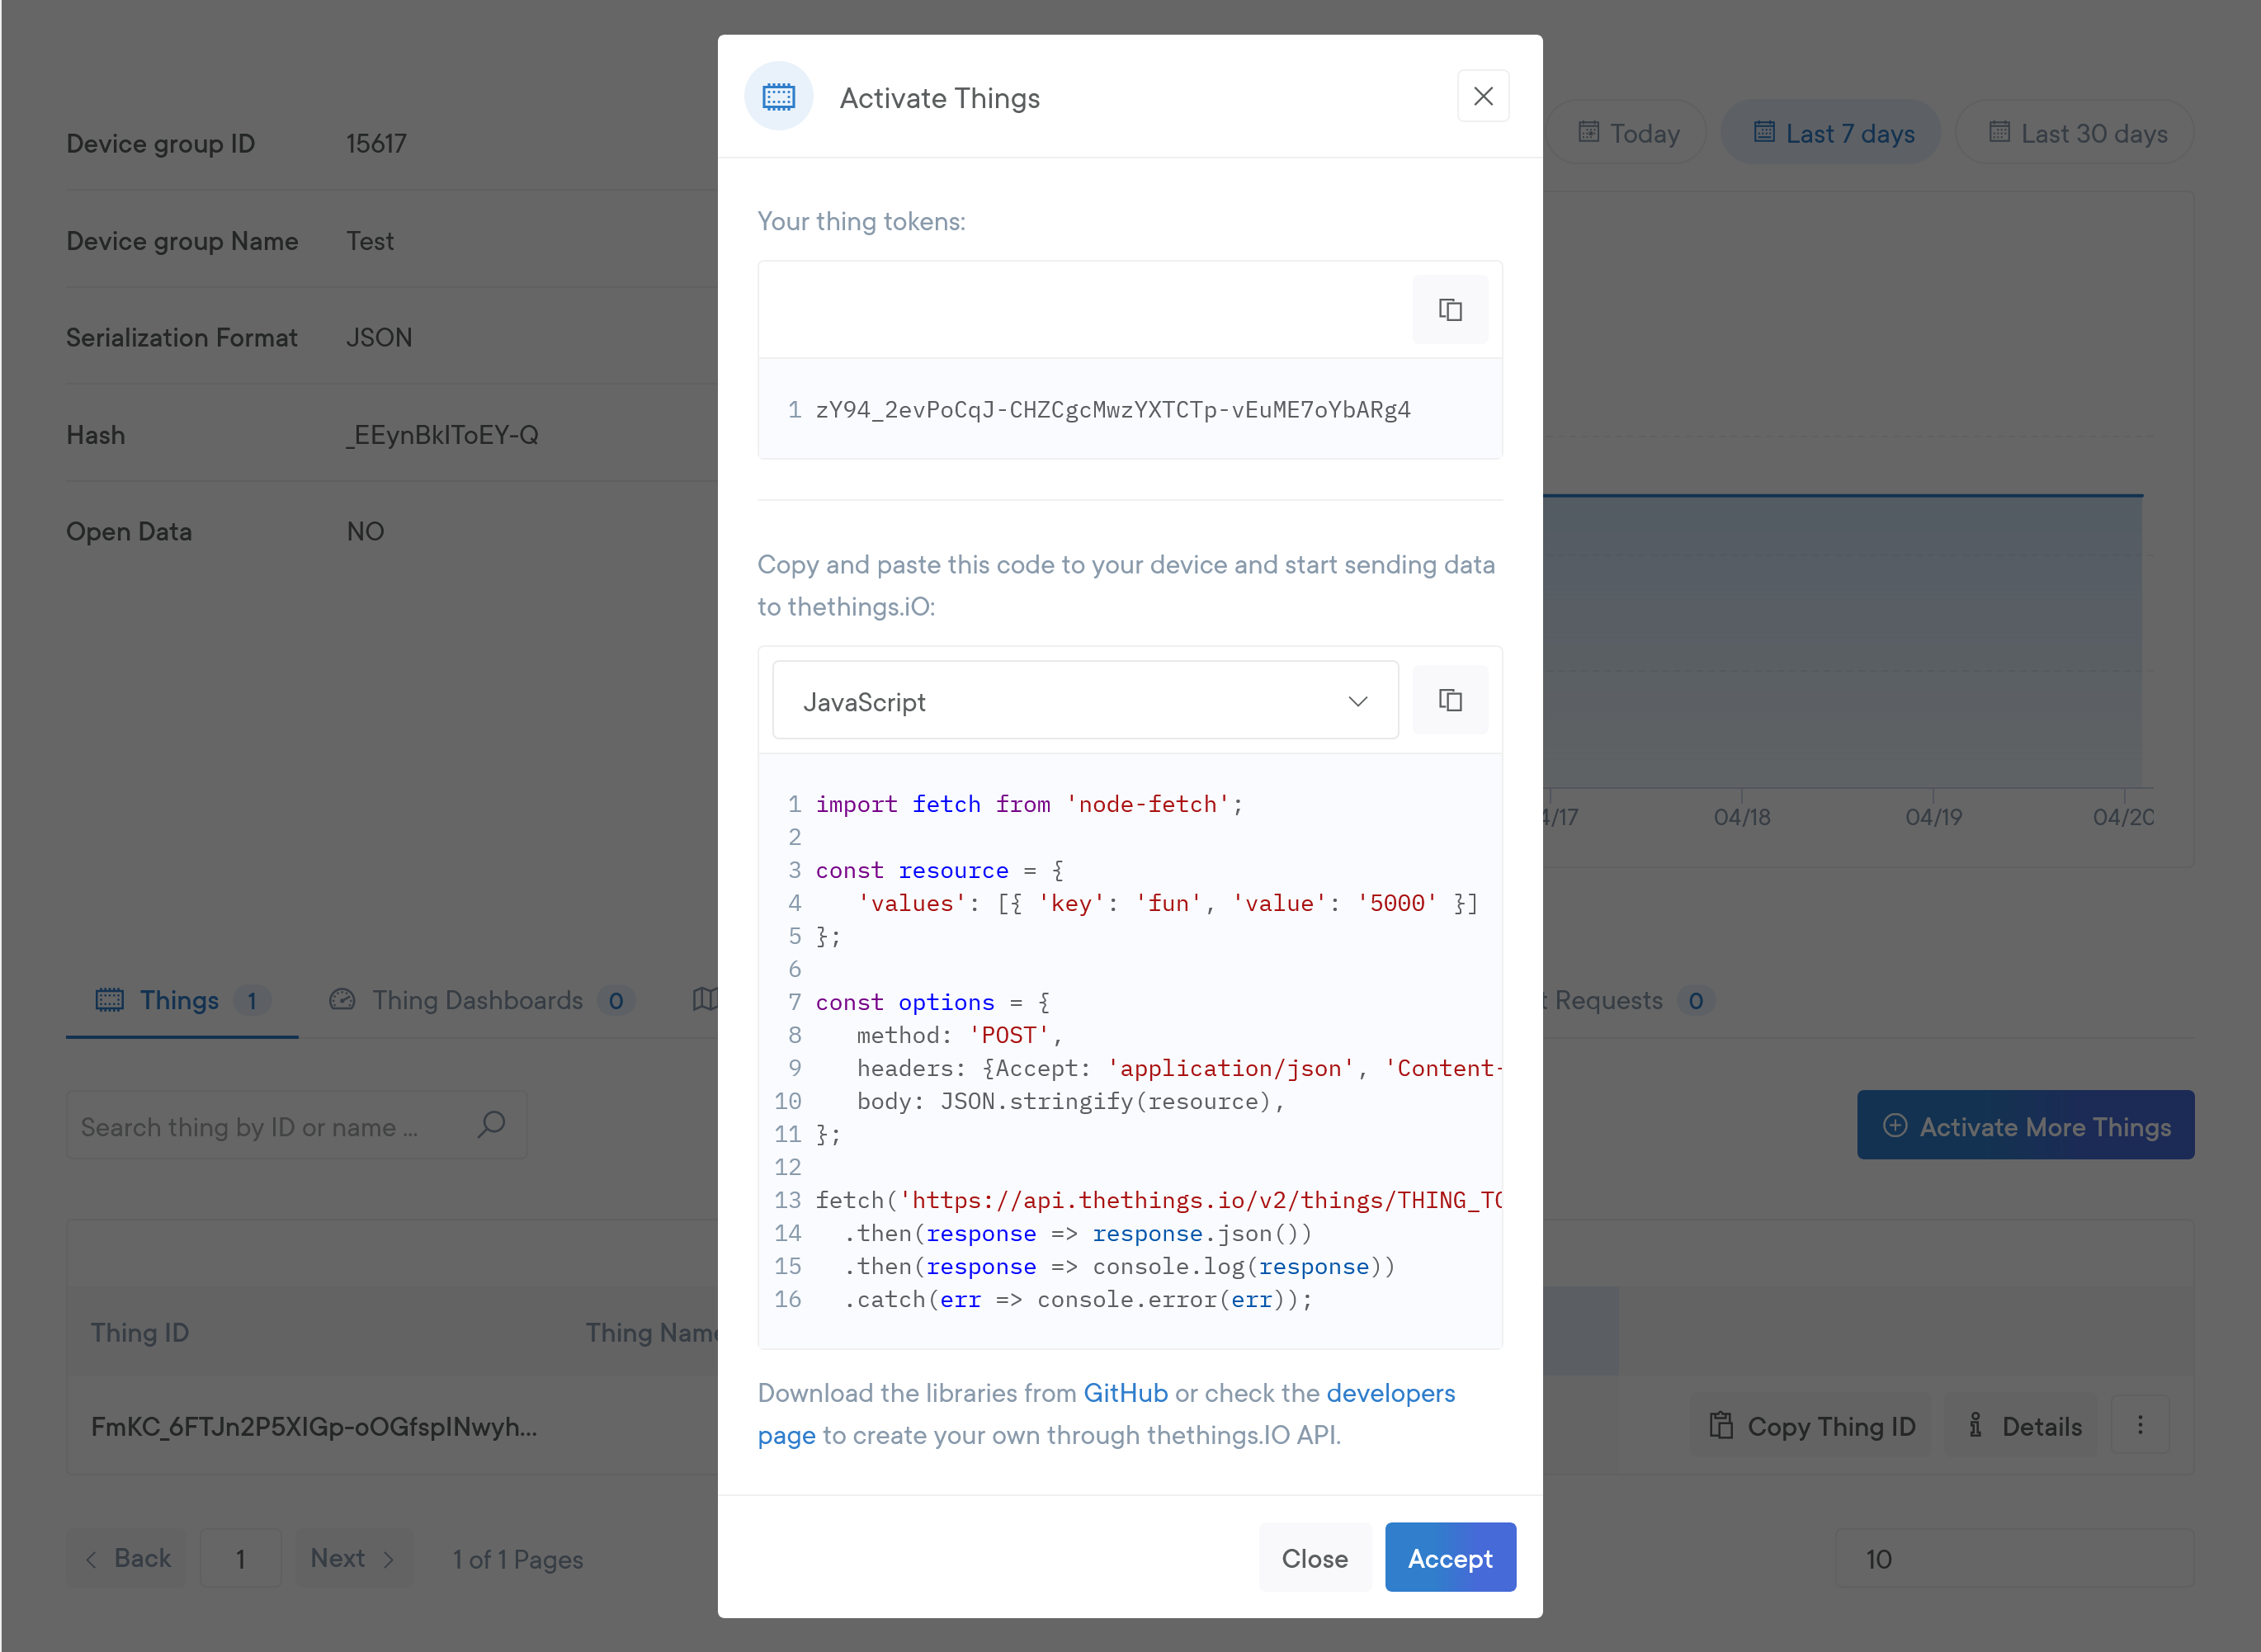
When you see the following form with the example code your first thing is already activated!
If you want to activate more things, and you are out of activation codes, you can upgrade plan.
Once a thing is created, this will have asociated a secure hashed identificator called thingToken.
This token will enable you to make API calls to thethings.iO from your thing.
You already received your token in the window with the example code that we saw before. If you did not copy your token let's do that now:
- Go to the Things Manager
- Click on your group of devices
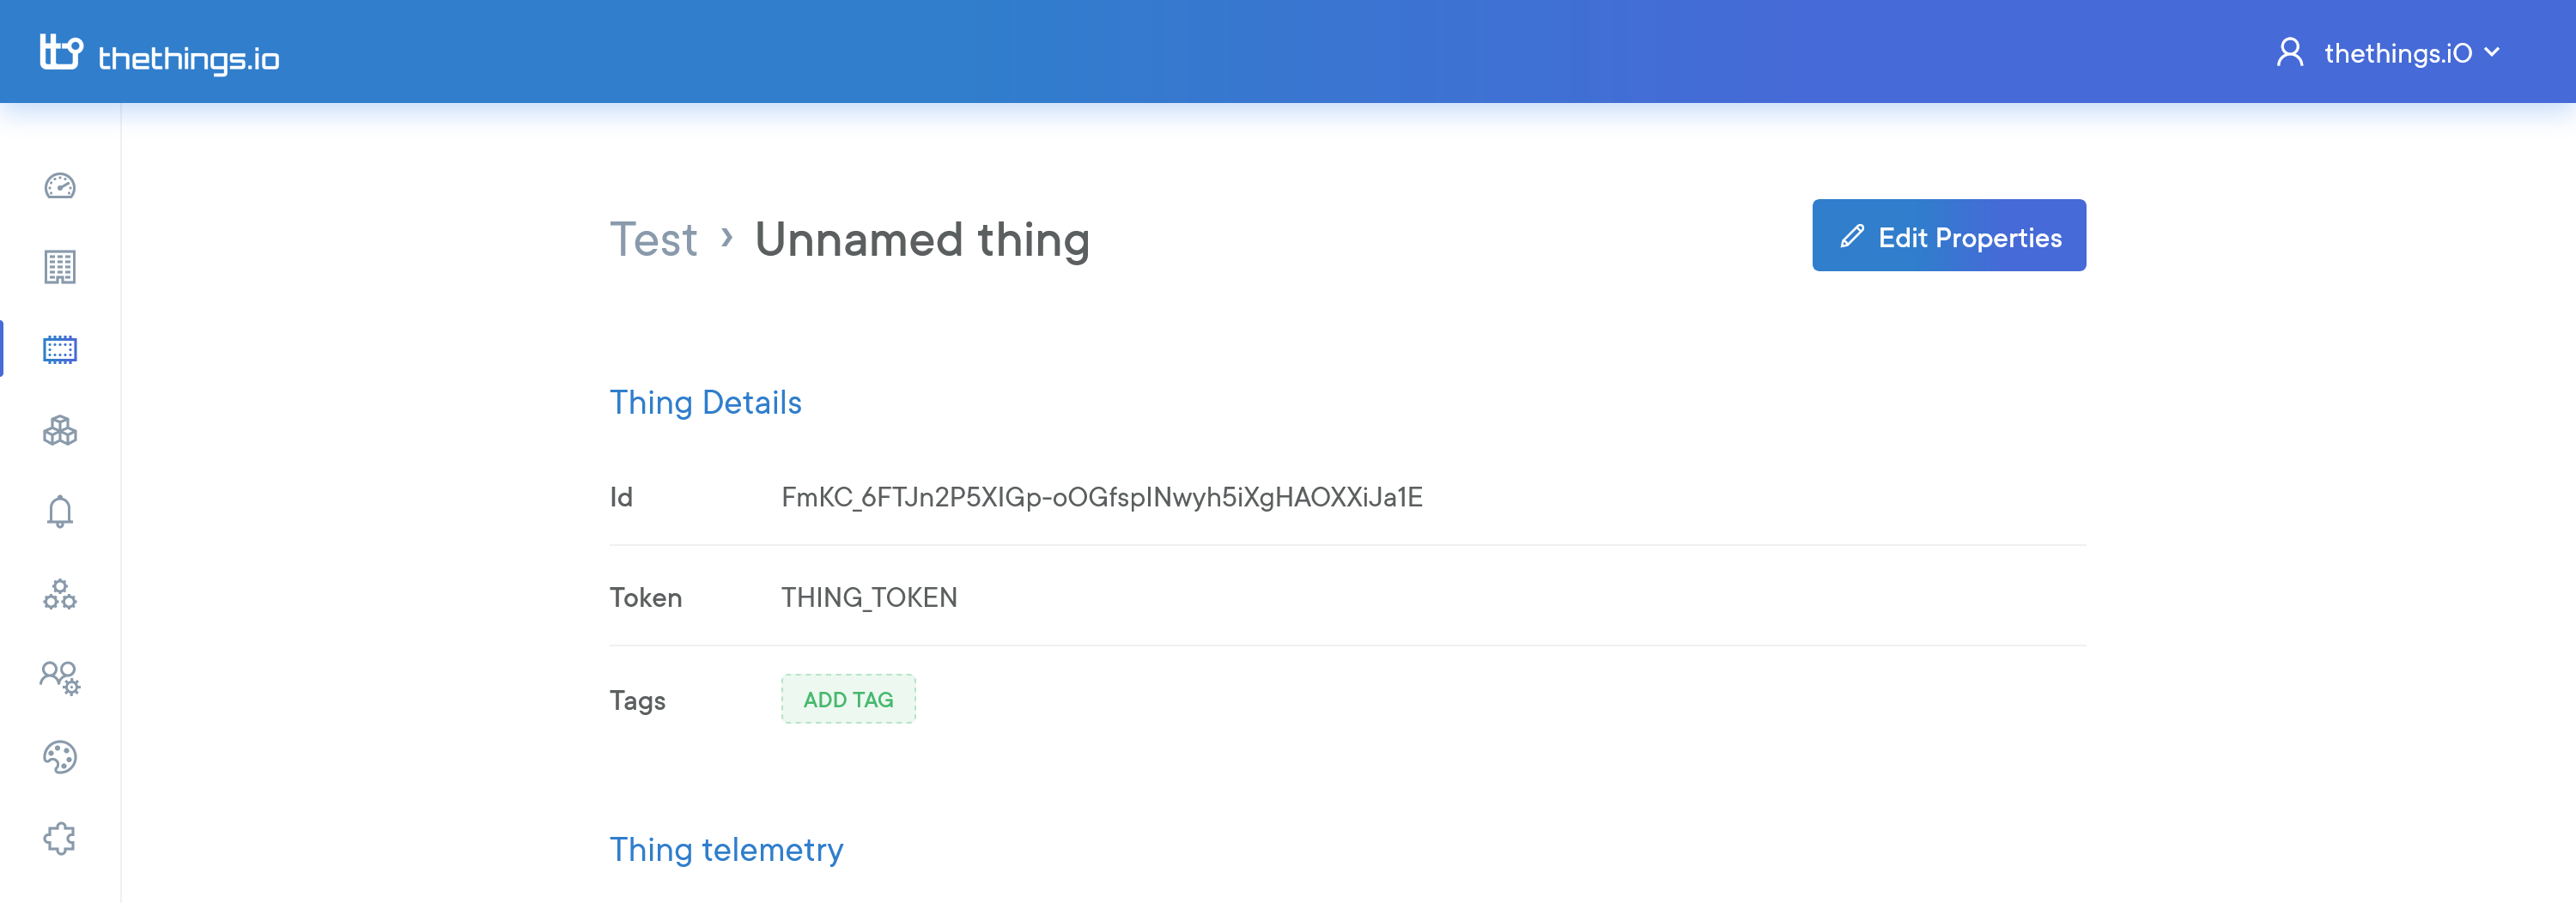
- Go to the device list and click at the details button.
- Then the first section contains the name, thingId and thingToken of your device. Copy your Thing Token.
From now on, if you plan to send data to thethings ingestion services like MQTT and HTTP all the requests will be done using your thingToken. In the other hand, if you are willing to use Sigfox devices or LoRa, when creating a group of devices a callback url will be provided so you can integrate with external backends/networks.
Step 3 - Send data to the platform (through API REST write endpoint)
Now, your thing can perform 3 types of actions:
- Write: Store one or several key-values pairs.
- Read: Reads the last values for a certain key.
- Subscribe: Subscribes to the real-time streaming channel of your things.
Write
Writes the records of data from the thing to the specified THINGTOKEN. Only alphanumeric characters and ".", "-", "" symbols are admitted for the resource name "key".
POST https://api.thethings.io/v2/things/THING_TOKEN
Remember to replace THING_TOKEN with the thing token that you got when you activated your thing.
curl -i -H "Accept: application/json" \
-H "Content-Type: application/json" \
-d '{ "values": [ { "key": "fun", "value": "5000" } ] }' \
-X POST "https://api.thethings.io/v2/things/THING_TOKEN" -k
# Store a value
{
"values": [
{
"key": "fun",
"value": "5000"
}
]
}
# Store a set of values
{
"values": [
{
"key": "fun",
"value": "5000"
},
{
"key": "temperature",
"value": "23"
},
{
"key": "humidity",
"value": "60"
}
]
}# Everything has gone well
{"status":"success","message":"created"}
# If you get this error, remember to change THING_TOKEN for a valid thing token.
{"status": "error", "message": "Thing token doesn't exist"}Read
This method returns the values of the resource with the specified KEY from the corresponding THINGTOKEN. To read data, use the operation GET /things/ with the_Thing Token and the KEY that you are using to store the values.
GET https ://api.thethings.io/v2/things/THING_TOKEN/resources/KEY
Remember to replace THING_TOKEN with the thing token that you got when you activated your thing and KEY with the name of the resource that you want to read. KEY examples: temperature, humidity, status, ...
curl -i -H "Accept: application/json" \
-X GET "https://api.thethings.io/v2/things/THING_TOKEN/resources/KEY?limit=10" -k
# Everything has gone well
[ {"value": "9000", "datetime": "2015-01-30T15:35:33.000Z" } ]
# If you get this error, remember to change THING_TOKEN for a valid thing token.
{"status": "error", "message": "Thing token doesn't exist"}
# If you try to read a key(resource) which you never write before, you'll get the next error. Remember to change KEY for a valid key.
{"status": "error","message": "resource not found"}Subscribe
The next method lets you subscribe to the thing channel and get real-time updates from all the thing's resources (keys). The subscription endpoint creates a streaming channel and we keep the channel opened depeding on the keep alive that you send. Check the API documentation to see further details on the keep alive options. If no keep alive is set, your router or our server will close the channel at its sole discretion.
To test the real-time updates, you'll need to open two consoles. One for the subscription command, and another console to do the write commands with curl as seen above.
GET https://api.thethings.io/v2/things/THING_TOKEN
curl -H "Content-Type: application/json" \
  -X GET "https://api.thethings.io/v2/things/THING_TOKEN" -N
# Everything has gone well
{"status":"success", "message":"subscribed"}
# If you get this error, remember to change THING_TOKEN for a valid thingToken.
{"status":"error", "message":"Thing with thing token 'Eyixxxxxxx-xxxxxxxx' not found."}Step 4 - Code yourself the decoder/parser (nb-IoT, Sigfox, LoRa only)
Jump to next step if you plan to send data through REST API or MQTT.
When we have already the device sending data to our platform to one of our data ingestion services, we need to transform the input data device that device is sending to the data structure thethings.io understand. This is key-value objects.
The parser will be coded inside CloudCode, you can access in the left navigation menu. This is a sandbox with a code editor to write Javascript code.
With the creation of a nb-IoT, Sigfox, LoRa group of devices, a parser will be created instantaneously in the function section. We actually have 3 sections inside Cloud Code, triggers, jobs and functions.
Now we can start coding our parser!

Click edit and start coding. For more information go to the Cloud Code section in our guide.
Once parser is finished and functional you can proceed to show that information in our custom widgets!

Step 5 - Visualize the data
In the panel you can visualize the data of your thing. To see these charts:
- Go the Things Manager
- Click on one of your device groups
- At the thing that you want to visualize click on 'Details'.

For every key that you have stored, you can visualize various types of charts like line charts, pie charts, logs, etc. Additionally, you can see past data on the historical tab and in real-time as the data arrives on the real-time tab.
